Showing posts with label Wood. Show all posts

Friday, October 6, 2017

Chenggal Shelf


We purchased a piece of Chenggal wood from a scrap yard in Sg Buloh when we were renovating our home. This was an impulse purchase as we did not have any idea on where or how we would want to use it.


To us, when we buy any wood pieces, we look for wood grain, eyes, uneven lines, dents, holes as all these bring characters to the wood piece. You do not want a piece that is 'clean' or straight as it would look like any other piece of wood.

This is what happens sometimes when you buy wood pieces, you will fall in love with it, you will find that the piece is speaking to you. 

Someone offered to buy this piece of wood when we used it as a shelf during one of our bazaar sales.  However, this piece was not leaving us!  Overtime, we changed our minds several times on what this piece of wood would be used for, from making it into a bed-end stool to making it into a table for display and finally after 5 years, we finally decided to use this in our loft for my art studio as a shelf.


The Chenggal wood measures 147cm (length) x 29cm (width) and it fitted nicely onto a wall sandwiched by two windows. P/S : Don't mind the air-conditioning hose!


So handyman Hubby fixed it. He made his own shelf holder as the Chenggal wood was very heavy. Needless to say, I am loving how it turned out. It now holds some of my favourite quotes, my plants and some of my craft items.

Let us know what you think, leave us a comment below. You can also follow us on our IG @urbanwood17

Thursday, June 5, 2014

Study Table

Hubby made a study table for our son and daughter.  The table top is made out of Balau wood and it sits on top of pedestal.  You can check out this site for more information about Balau wood at 
http://www.woodsolutions.com.au/Wood-Species/shorea-albida

For our son's study table, the wood was sanded down, treated and varnished.  For our daughter's study table, she did not want the table top to be varnished, she wanted it natural so we left it as it is, but it was sanded down and treated as well.  

Due to budget constrains, we purchased 2nd hand pedestals from Kedai Kaki Lelong (www.kkltrading.com/) and fixed the table top on top of the pedestal for our son.  Since then, we have made several trips back to the same shop to look for the pedestal for our daughter and were not successful as either the height was not right or the pedestal had some defects.  In the end, we managed to find only one pedestal and substitute the other pedestal by purchasing a metal table leg. 

The study table taking shape, pedestal not high enough,
had to put a piece of plywood to raise it
The metal leg table
A close up of the table top, Balau wood not vanished
This is what it takes to make a study table

Furniture Hunting

We've made another stop to our favorite shop again Kedai Kaki Lelong (www.kkltrading.com).  We love going there now and then to see what new stuff they have.  

If you are looking for 2nd hand furniture, visit the one in Ara Damansara.  If you are looking for kitchen ware such as plates or bowls, visit the one in Section 19, PJ.

This time we went there to look for a pedestal for our daughter's room.  However, we left with more than a pedestal, we bought not only the pedestal but a table leg, wooden shelves, plates, decorative girll and a decorative wooden organiser.

Heaps of wooden organisers, good for TV remote controls
Bought : 1 piece
Heaps of wooden shelves
Bought : 3 pieces
Office desk, thought of getting it for my craft room
Did not buy
Beautiful blue and white bowl, orange sauces and Chinese plate
Bought
Tile for decorative purpose or for hot plate
Bought : 1 piece
Tile for decorative purpose
Bought : 3 pieces
The decorative organiser, washed and cleaned
Metal pedestal for our daughter's room

The decorative grill that will be used for our patio
Bought : 2 pieces
The metal pedestal and leg from Kedai Kaki Lelong
Table top is made by Hubby
Our daughter's study table
The wooden shelves from Kedai Kaki Lelong
Put up in our kitchen

Friday, January 17, 2014

DIY Patio Update

Our DIY Patio is about 60% completed.  We are now preparing for the roof tiles.  Initially we planned that once the insulation is up, we will install the roof.  However, when you look up, you will see the insulation, something like looking at tin foil. So it was a no no.  Then, I wanted the look of something like a resort, where you look up, you will see the roof tiles.  That idea too was 'rejected' by Hubby, reason being was that it would make the patio very hot if we wish to sit there in the afternoons, due to no insulation.

So now, Hubby has install ply wood which was stained, followed by the insulation and then up goes the roof tiles. More updates soon!  In the meantime, here are some pictures to show you on our DIY Patio progress.

Recap : BEFORE DIY Patio was installed
Recap : AFTER DIY Patio was installed
Cutting the ply wood to size
Hubby's new 'toy' a jigsaw cutter.
Purchase for less that MY100.00 at Cash Converters
BEFORE : We will be looking at the insulation,
which looks like aluminium foil
AFTER : Now we will be looking at ply wood,
which feels much cosy to look at
The insulation before the roof tiles is installed

Saturday, November 30, 2013

DIY Patio

We love the idea of a cosy patio, where we can have breakfast, tea and entertain families and friends.  A patio surrounded by comfortable furniture, lush green plants and beautiful and colorful flowers.  So when Hubby said that the patio will be up before Christmas, I was excited.  Hats off to Hubby who built the patio from scratch.

The wood that we used for our patio is Chengal wood and it is recycled wood.    We acquired some of the wood from a public playground, where the multiplicity council decided to replace wood with high quality plastic, and some wood were purchased from our regular lumber yard, which were also recycled from old kampung houses.

For the roofing, we will be using roof tiles.  Initially, we were contemplating to use glass sheet or poly carbonate glass.  However, we felt that this would not give us that cosy feeling.  We wanted a resort like feeling, and to match the house so we decide to go for roof tiles.  I will save the story of our roof tiles for another blog post.

So here are the chronicles of our DIY Patio ...

Recycled Chengal wood from a public playground.
Our home before the patio
Wood purchase from our regular lumber yard.
We sanded down and varnished the wood.
Hubby cut the edge of the wood for some design.
The wood cut to shape.
The wood is varnished and will be used as beams.
Here Hubby sets the beam.
Beams all set.
One of the pillars is secured to the wall.
The pillars are up.
Another view of the pillars.
Now the beams go up.
The patio is almost done ...
The roof is covered with roof aluminium sheet.
This will act as a cooling function for the patio.


Sunday, April 14, 2013

Recycled and Reused Crate

There are a lot of projects on the internet for recycled crates and pallets.  So we decided to give it a try too. When I saw this crate, I fell in love with it!  I knew exactly it's purpose and where it would fit in our home. A shelf in our laundry area that could hold all our detergents for clothes, dishes and floors.

It was not in prefect condition, we had to change the base and make a few repairs but other than that, this was a pretty easy and fast project.

The condition of the crate when we first brought home.
Love the text at the side of the crate
Had to remove the foam from the box.
Had to remove the remnant of the foam by using a blade.
The crate had to be repaired here and there.
The broken piece.
A little nail and hammer did the job.
The broken based was removed.
Replacing the base with a thin plywood.
Our little laundry area.
It's up! We now have a laundry crate shelf!
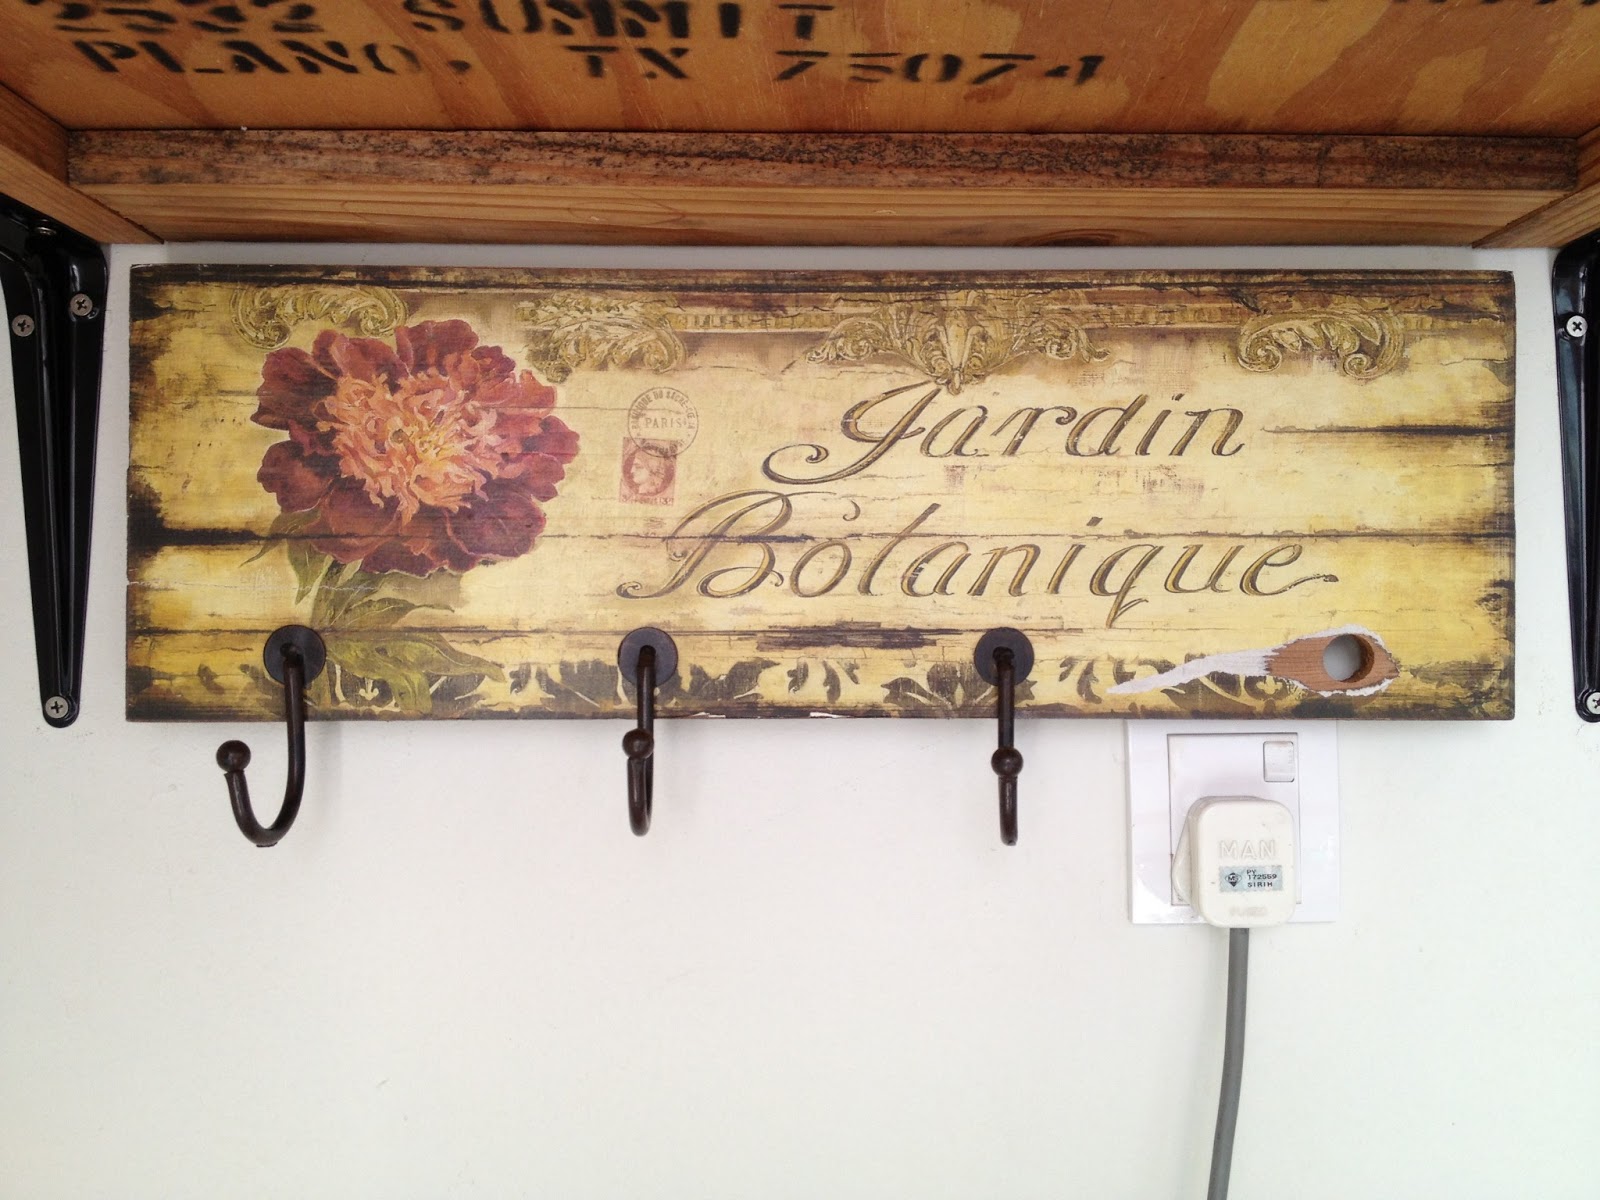
The laundry crate shelf with a hook board at the bottom.
The laundry crate shelf now holds all the detergent.
A close up of the hook board.  It was priced at RM29.00 but
because it was missing a hook and the picture a bit torn,
I managed to get it for RM10.00 AND I suppose
it's a blessing in disguise as the 'missing' hook
is missing at the right place because of the plug point.