Showing posts with label DIYs. Show all posts

Wednesday, January 14, 2015

Furniture Refurbishment

We recently brought home two rattan chairs that were thrown away.  I see these chairs every time on my way to work, but because they were thrown in the shrubs, I could not take them myself.  So finally, on one Saturday, I dragged Hubby along and we went to get the chairs.  One was in good condition and the other not so.

These chairs will go nicely into the children's room for their study table.  We brought them home, gave it a good wash and Hubby sanded it down.  Next step will be to spray paint it to the color of our children's liking and buy a cushion for these chairs.  The girl wants her chair to be Mint color while the boy wants his chair to be Silver or Gold color.

This will be our 5th Chair Refurbishment. We also refurbished a baby rocking chair and you can read about it here and here.  We also refurbished other rattan chairs which we picked up from road sides and dumpsters.  You can read about these chairs here

This is where we found the rattan chairs
We had to wash the chairs as fungus was growing on the rattan chairs
Left : After sanding down
Right : Before sanding down
Before being spray painted
After spray painted and I sewed the cushion cover

Thursday, June 5, 2014

DIY Patio Update : Roof Tiles

Wow ... blogging duties neglected ... anyway ... here we are back again ... we have a lot to update but let's start with the roof tiles for the patio.

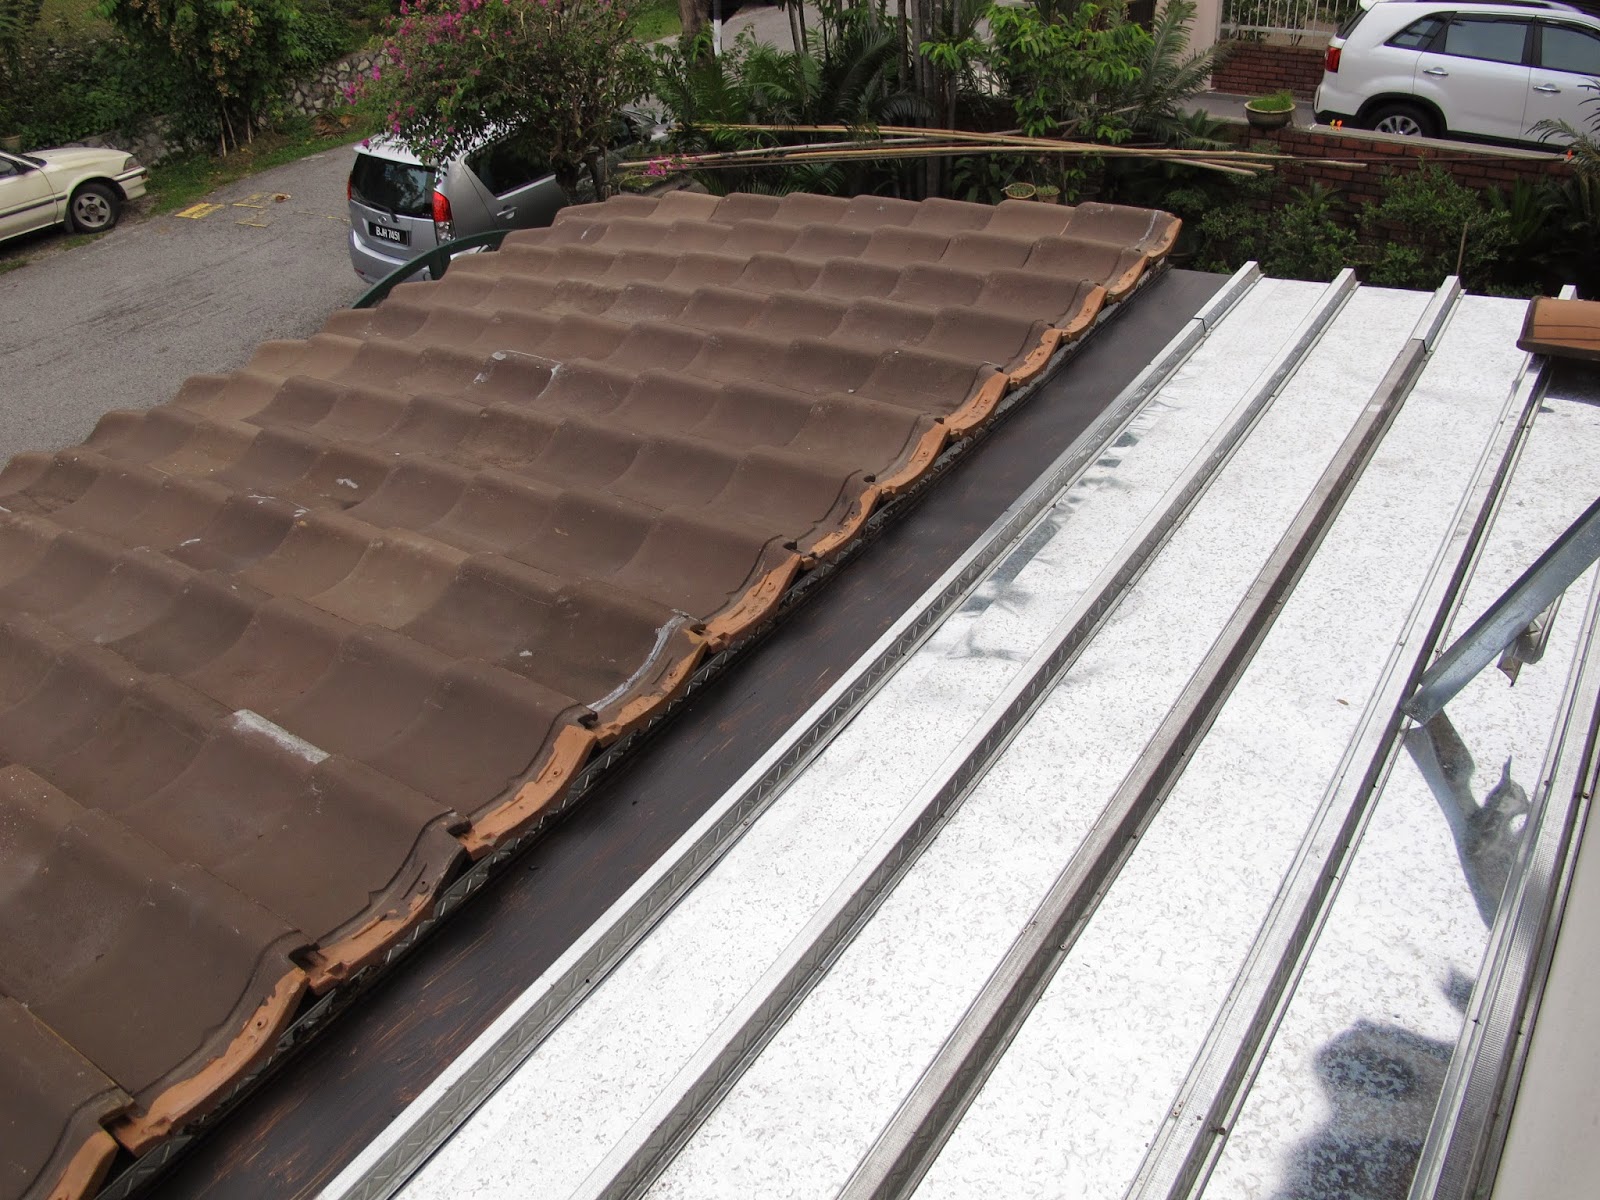
Ok, so the roof tiles are finally up after 5 weekends.  It took team work to get those tiles up.  Hubby was up at the roof, me on the ladder and kids on ground, kids passing me the roof tiles and me to hubby.  The roof tiles had to be removed after it was installed as it was leaking.  After Hubby rectified the problem, fingers crossed, so far so good.  Only left to do is to installed the gutters as rain water is going into our neighbors compound.

So here are the pictures and what we did ...

Tiles being brought up
The baton is set according to the tiles
A close up of the baton
The baton being secured onto the plywood
The roof tiles are ready to be laid
Tiles being laid from outer roof to inner roof


The plywood is quoted with water proof paint, Bituflex 101

Tiles are laid in progress


Friday, August 30, 2013

Baby Rocking Chair

I found another Chair! ... rather I picked up another chair that somebody threw away. Hmm ... note to self, I may have a weakness for Chairs, besides Bags and Fabric.

Anyhow, it's a Baby Rocking Chair made out of rattan.  My little CinaBoy just loves it, he sits on it like a little man.  Of course, this chair would need some repairing, why else would someone throw it out.  Not to worry when I have Mr Hubby as my handyman.

Who would have thought that fixing this little chair would take almost one whole day. Hubby had to restring the chair together with rattan strips as well as nail them together. I am rather keen on spray painting the chair to a blue or teal color.  Hubby thinks that I should leave it as it is ... maybe I should check with my CinaBoy what color he wants ...

The Baby Rocking Chair
Different view of the Baby Rocking Chair
Needs repairing
More repairing needed
To use the rattan strip to tie and nail
Love the color, I think would look great on the Baby Rocking Chair

Sunday, April 14, 2013

Recycled and Reused Crate

There are a lot of projects on the internet for recycled crates and pallets.  So we decided to give it a try too. When I saw this crate, I fell in love with it!  I knew exactly it's purpose and where it would fit in our home. A shelf in our laundry area that could hold all our detergents for clothes, dishes and floors.

It was not in prefect condition, we had to change the base and make a few repairs but other than that, this was a pretty easy and fast project.

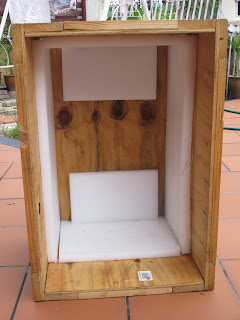
The condition of the crate when we first brought home.
Love the text at the side of the crate
Had to remove the foam from the box.
Had to remove the remnant of the foam by using a blade.
The crate had to be repaired here and there.
The broken piece.
A little nail and hammer did the job.
The broken based was removed.
Replacing the base with a thin plywood.
Our little laundry area.
It's up! We now have a laundry crate shelf!
The laundry crate shelf with a hook board at the bottom.
The laundry crate shelf now holds all the detergent.
A close up of the hook board.  It was priced at RM29.00 but
because it was missing a hook and the picture a bit torn,
I managed to get it for RM10.00 AND I suppose
it's a blessing in disguise as the 'missing' hook
is missing at the right place because of the plug point. 

Wednesday, April 3, 2013

Recycled and Reused Dining Bench

The two Dining Benches for our Dining table is another project that Hubby did.  The bench is made out of Kempas Wood and the legs are made out of two single 2ft louver.  The bench itself is about 7ft long and can easily sit 3 adults.  So our Dining table has two chairs on each end and the two dining benches on the left and right.

These louvers are from old colonial bungalows which was built circa 1880s.  It would therefore make these louvers about 100+ years old.  Kudos to Hubby who comes up with these creative and innovative ideas.  Who would have thought of  making louvers as bench legs.

You can read more about the louvers that we made as an air-conditioning compressor cover in my other blog post here

Like all other wood projects, we had to clean, scrape and sand down the wood.  Once all this is done, these woods were given a chemical treatment.  We would normally varnish our woods but for these benches, we have decided to leave it with it's natural wood color.

One of the four 2ft louvers that we bought
A close up of the louver with it's before clean up condition
Another one of the four louvers
Child labour? Nah ... they just love scraping the old paint out!
Left : A 'clean-up' louver
Right : Paint scraped out and waiting to sand down
Fixing the louvers to the bench
A close up of the wood and the louvers
For extra support and for decorative purpose,
we used the Ikea bracket for shelves
 
Completed : The dining bench with louvers as it's legs
The Dining Bench in use!


Saturday, March 30, 2013

Recycled and Reused Louvers

For this blog post, I will be taking a detour from the House Tour and would like to share with you on some of the wood projects that we have been up to.

Hubby had his eyes set on some louvers that we saw at a lumber yard that recycles old wood items like doors, windows and woods.  These louvers are made out of Chengal wood and is easily about 100 over years old.  Just lifting a 2ft Chengal louver is heavy enough!

What is a louver you ask?  Well, according to Wikipedia, a louver (American English) or louver (British English) is a window blind or shutter with horizontal slats that are angled to admit light and air, but to keep out rain, direct sunshine and noise.  The angle of the slats may be adjustable, usually in blinds and windows or fixed.

In Malaysia, you can find louvers in old colonial houses like those in Kuala Lumpur, Penang & Ipoh.  However, in newer houses, you'll not find them anymore as modern louvers (if any) will be made out of metal.

So Hubby had this idea of covering the air-conditioning compressor area with the 4ft louver we purchased.  He also had the idea of making the smaller louvers as bench legs which were 2ft each for our dinning bench.

An old colonial house with the louvers above the window shutters
Another picture of the colonial louvers
We were deciding on which louvers to choose.
Initially we thought of the louver lying on the floor with the hold in
middle.  We thought of adding in a Nyonya glass but decided against it
as it would be too much work to do.
So in the end we decided on this louver, 4ft and perfect
for the air-conditioning compressor area.
This is the louver that we bought for the air-conditioning compressor area.
Once we brought it home, we had to take out the planks,
sand each one down as well as the frame.
The planks which had about three or four coats of paints over the years.
After sanding down the frame, hubby varnished the frame
and gave it some chemical treatment.
In the end, this is the varnish color that we choose. 
The planks were also varnished and fitted back.
Here is Hubby fixing the louvers onto the air-conditioning compressor area.
Before : The air-conditioning compressor area is empty and open.
After : The air-conditioning compressor area is now covered up with the
beautiful restored and recycled louver.
After : Another after picture of the facade.